I have never been really satisfied with any meteorological widget that I found for my iPhone. The widget of the application of the native climate is fine, and the options such as the carrot climate are fun, but none allows me to see what the climate is like in an instant, without having to interpret all the data and icons. That is why I decided to create mine using shortcuts.
None of the meteorological widgets that I have used on my iPhone has really felt so useful. The reason is that most of them provide too much information or very little. A widget with a single climate icon really does not tell you so much, and a widget that tells you everything, from the high and low temperatures to the precipitation percentages, it is too much to enjoy a look.
I always wanted a climate widget that can give me a clear visual representation of the weather that I could see and understand immediately. I tried to do mine several times in the past, and with some of the new features in iOS 26, I have finally been able to do one that I want.

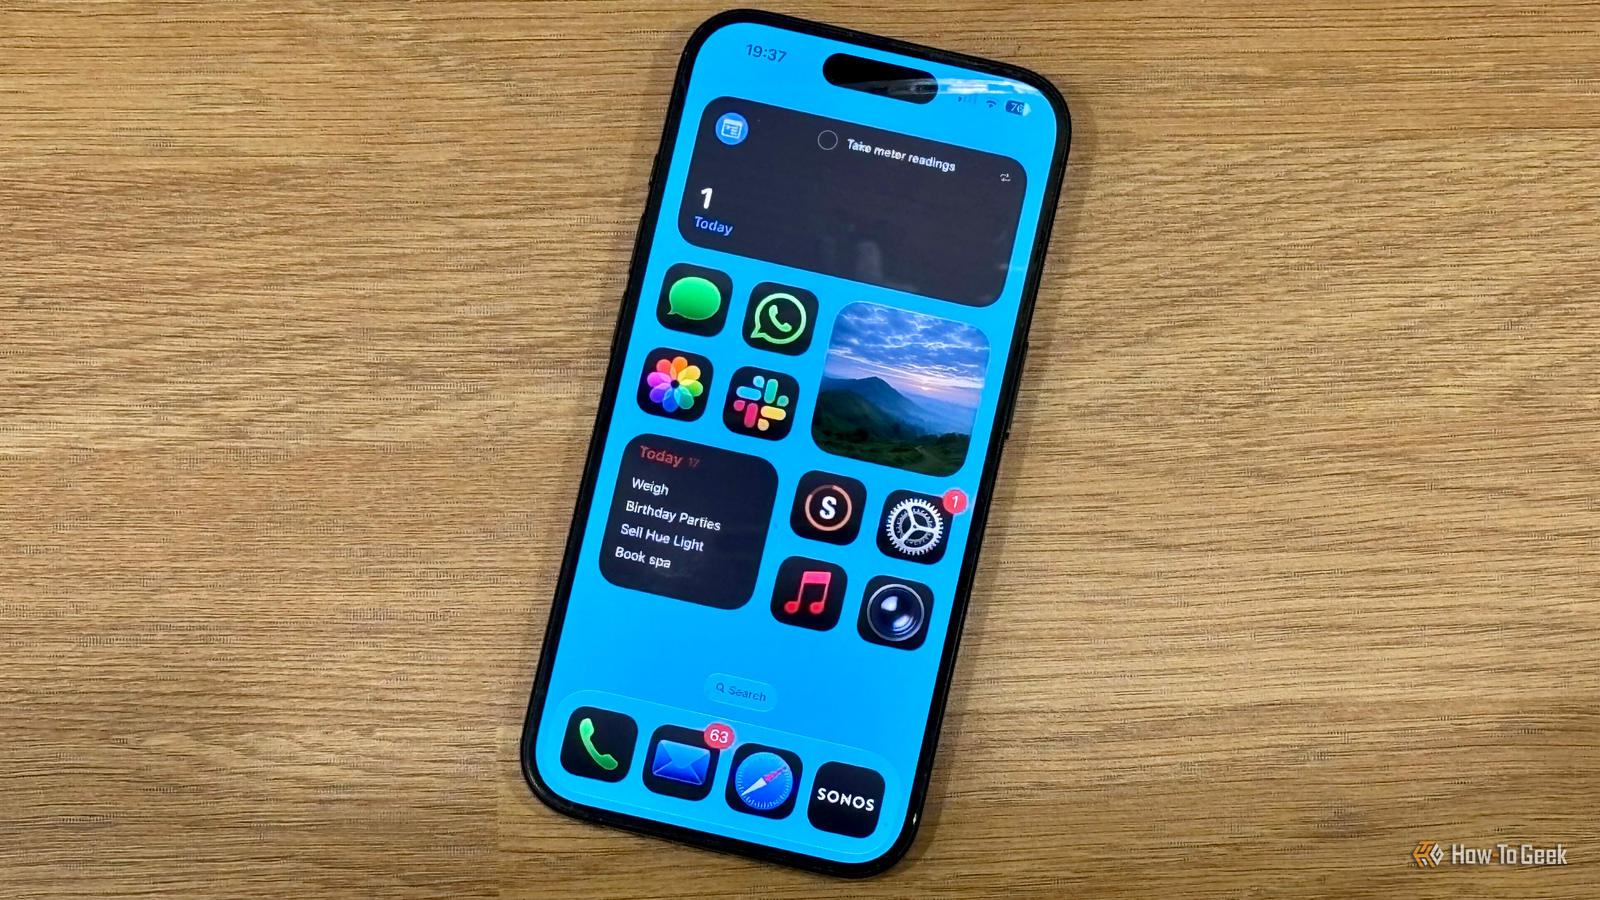
My personalized widget shows an image that is representative of the current climatic conditions, so you can see how the weather is simply looking at my home screen. The image is configured to update three times a day, so that it changes as climatic conditions change. It is a simple but effective way of knowingly knowing how the local climate is with a single look.
The current GET weather action can provide local climatic conditions
I created my meteorological widget using the shortcut application. The action of the “current climate” has existed for some time and allows you to obtain climatic conditions in its current location. There are other weather actions that you can use, but they were not ideal for my purposes. “Obtain the weather forecast” gives you information per hour or daily, but this was too narrow or too broad for my needs. “Obtaining details of climatic conditions” allows you to select the specific weather information you want, but this was too specific. The “current climate” gives me the conditions and temperature, which are all I need for my widget.
To add the “Obtain current climate” action to your shortcut, open the application for a shortcut and create a new shortcut by clicking on the “+” (more) icon. Touch the “Search Actions” field and write “get the current climate.” Select the action “Get the current climate.” Leave the location as “current location.”
The “use use model” action allows you to generate a message of image generation
The action of the “use model” is a new direct access action that is the key to my meteorological widget. It allows you to use a generative AI model to promulgate a specific notice. You can use a model on the device, the private model based on the Apple cloud or use chatgpt to process the application, which occurs out of service. For my widget, I’m using the chatgpt option.
I asked the AI model to create an image generation indicator for an image that represents current climatic conditions. Later in the shortcut, I will pass this image generation request in an image generation action to create the image for my widget.
Touch “Search actions” and write “use of use” in the search field. In “Use model”, select the “Chatgpt” option. You should see the “climatic conditions” variable in the “use chatgpt” action. This indicates that the climatic conditions of the first action have been passed to the action of “use model”. Add a message that asks to the model that generates a description of the image based on climatic conditions. For example, my warning is “to generate a short two -sentence image description of an image that can be passed to the recreation patio that represents the key information of these climatic conditions. Do not give any text other than the description.”
You can make your images even more personalized by adding an action to “obtain the current location” before the “use model” action and add the location to your notice, asking the model to generate a representative image of its current location. The beauty of this method is that your images will change so that they coincide with their location, regardless of where you are.
The action “create image” converts its notice into an image
Once you have used the “Use model” action to create a message of image generation, you must pass that application to the “create image” action. This will use your warning to generate the image for your widget. The “creation image” action can use the generation of image of the Apple image, or can use chatgpt to generate the image. Image Playground cannot create photorealistic images, and when I tried them, I often could not create an image from the generated notice, so I used the chatgpt option, which produces impressive results.
Touch “search actions,” write “create image” and select the “create image” action. Touch “Description” and select the “answer” variable that must appear above the keyboard. This is the image generation notice generated by the previous action.
Touch the arrow, select “answer” in the “style” section and choose “delete variable” to eliminate it. Touch “animation” and select “chatgpt”. Touch “always” in the “Save Playground” section and select “never” unless you want to save a copy of all your meteorological images in the playground application.
The “Save Image” action keeps its weather image to a specific album
The final stage for your shortcut is to save the image generated on your phone, so you can use in your widget. You must create a specific album for your weather images and, unless you want them to fill your camera roll, you must also include some additional actions to eliminate older versions, which requires adjusting shortcuts. Then you can save your image on the empty album.
Open the photos, touch “Collections”, select “albums” and click on the “+” (more) icon at the top of the screen. Select “New album” and give the album a name, as “weather images.”
Go to configuration> Applications> Direct access and “advanced” touch. Alternate “allow eliminate without confirmation”. This will allow you to eliminate old images without having to manually confirm the elimination.
In the application, touch “Search actions”, write “Search photos” and select the “Find photos” action. Touch “Image” and select “Delete variable”. Touch “Add filter”, select “choose” and select the album you created. Touch “search actions,” write “delete photos” and select the “Delete photos” action.
Touch “Search actions,” write “save in photos” and select the action “Save in photos”. Touch “photos” and select “Delete variable”. Touch “entrance” and select “image.” Touch “Memories” and select the album you created.
Touch the name of direct access at the top of the screen. Select “Change the name” and give a name to direct access a memorable name.
Your shortcut is now finished and something like the images below:

Execute it once playing the “play” icon at the bottom of the screen, which should generate its first weather image. It can take a few seconds to complete. Execute it again by playing the “play” icon once again, and this time, there will be an image on your album to eliminate, which will bring a notification. Touch “always eliminate”, and you should never see this notification again.
The last step is to make the generated image show in a widget on its iPhone. You can do this using the free WidgetSmith application, which allows you to show the most recent photo of a specific album on your home screen.
Install the WidgetSmith applicationÁbralo and touch the “+” icon (more). In “Home screen”, select the size of the widget you want to use. Choose “more recent on the album”, and in the “album” tab, move and select the album where your weather images are saved. Touch the blue verification mark on the top of the screen to create your widget, give it a name and guide it.
To add the widget to your home screen, touch and hold in an empty screen region. Touch “Edit” at the top of the screen and choose “Add Widget”. Show down and select “WidgetSmith”. Select the widget size you want and touch “Add Widget”. Touch the widget name if you don’t show the correct option. Select your meteorological image widget and touch another place on the screen. Your widget should now appear on your home screen.
You can use automation to update the image when you want
For your meteorological widget to be useful, it must be updated as the weather changes. You can use automation shortcuts so that direct access is executed at specific times every day. This will generate a new image based on current climatic conditions, and WidgetH Widget will be updated to show the new image. I have mine prepared to run at 7 am, noon and 6.30 pm every day.
Touch the “Automation” tab at the bottom of the application. Select “Time of day.” Enter the time you want to run. Select “Diario”. Choose “Execute immediately” and make sure “notify when you run” it goes out. Touch “Next” and select your freshly created shortcut. Repeat the process for any other time you want the shortcut to run.
Your shortcut must now be automatically executed at the times of the day you have selected, and your home screen widget should be updated to show the most recent image, which allows you to see the current climatic conditions at a glance.
When I started working on this model, I hoped that I could make it run locally using the model on the device to generate the system indicator and the generation of local images in the playground to create the image. Unfortunately, none of the models was able to function in a consistent way, so I was forced to use the Chatgpt models in both cases. With luck, as Apple models improve, a point where all processing can occur on the device will come, and I can have my own truly local weather widget.
#iphone #widget